 |
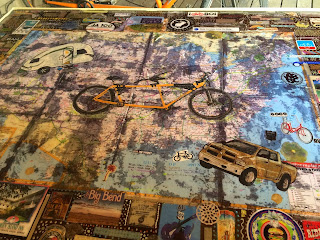
| It came out perfect this go around. |
 |
| After I glued down the pieces, I added dots and swirls of paint between the ephemera. |
 |
| I decided to start painting on the resin. I painted our tandem bike. I really liked the way it turned out so I painted some more... |
 |
| Next I added our teardrop R-Pod trailer complete with our little pink and blue trailer shoes under the door. |


2 comments:
pam I got here via facebook
and your table looks fabulous.
because you had to remove that beautiful map, I wanted to tell you about a new "glue" I just learned about. it is amazing. no bubbles, no wrinkles ever!
I learned about it from my studio-mate. she taught high school Art at one of our high schools here in santa rosa.
anyway it's WALL PAPER PASTE!
I am sold on it. it's relatively inexpensive, easy to use (I make it in small batches, just add water, and I keep it in a re-sealable tub from the deli, and it keeps for a couple of weeks)
after the paper is laid down and it dries, I seal it with a couple coats of Liquitex gloss varnish.
(I know the wall paper paste lasts, because I have original wallpaper on some of the walls in my house that's been there for over 50 years!)
anyway, you should try it. I'm telling you . . . you will love it. it's great for larger projects, like tables, or if you do a wall collage. (im thinking of wallpapering a wall in the guest bathroom with sheet music.
take care, sorry this went long . . .
Thanks Rebeca! I used to buy wallpaper paste when I taught elementary art for making paper mache but I never thought of using it in a collage.
Post a Comment